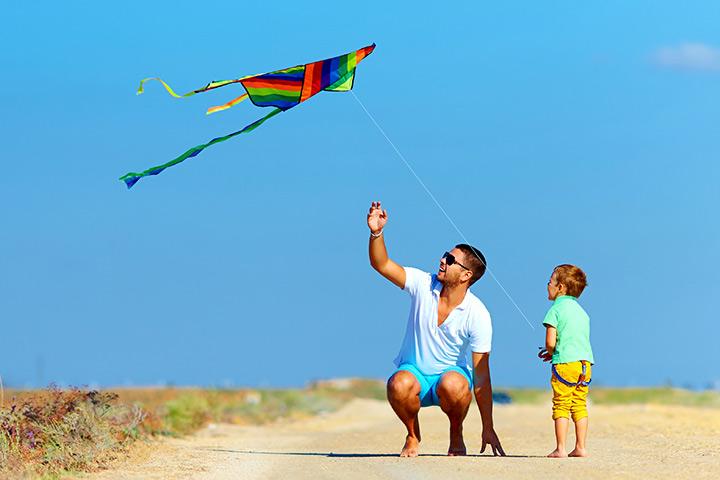
The Diamond kite is perhaps the most known type of kite in the Western world at the moment.
For centuries it has stayed well-liked owing to its steady and consistent flying features.
Usual or traditional diamond kites are typically a flat, lengthened diamond shape that needs a tail.
Recent or modern diamond kites are designed with a bow or curve to the usual or traditional diamond that condensed the need for a tail. They are simple to make than you may suppose.
Once you arrange or collect your materials, you will be able to make a version that will use a string-supported frame and a paper body. You also be able to make a kite with a trash bag, which possibly will be a slight sturdier than paper.
Here is a complete but really simple tutorial for you on How to Make a Diamond Kite:
When Diamond Kite Invented
Kites were invented in Asia, while their literal origin can only be wondered. Several near the beginning sources point to China.
Ancient and medieval Chinese sources explain kites being used for assessing distances, testing the wind, elating men, indicating, and messages for military operations.
Importance of Diamond Kite
Kite is taken as a sign of having high objectives and an important vision. Man constantly had an inherent desire to fly so high in the sky that can reach the horizon.
Kite flying is an old and usual custom in approximately all developed as well as developing countries.
Countries like the USA, UK, France, Germany, Japan, etc., are commonly accomplishing International Kite Flying contests and Workshops on kites each year.
Flying kite in our free time as it restores energy and gives several reimbursements to our body and this also helps in reducing anxiety and worry being produced in the present day to day life.
Why We Fly Kites?
It is actually a physical exercise for the brain, arms, legs, neck, and eyes which is very good for your body and for good health.
Kite flying helps in improving eye spectacle as eyelids are to be moved continually along with each varying instant of the kite fly high up in the sky.
Flying the kite under the blue color of the sky also gives us softness to our eyes.
Mainly kites are flown in the parks and under the Sun so to take Vitamin ‘D’ and fresh oxygen into our body are absolutely instead of watching TV, playing on computers and other indoor games or activities.
Further oxygen is being abounded to lungs and heart means building up of a stronger and healthy heart.
A stronger heart reins the supply of blood to all body parts fairly powerfully and keeps the blood strain of a body usual and therefore decreases the chances of a heart attack.
We should also start flying a kite at least once a week and hence lead a content, healthy, anxiety and tension-free long life.
How to Make a Diamond Kite?
We have all seen a diamond or any kind of diamond. It is very simple to make and you can almost certainly do it in half an hour.
It only takes a few pieces of equipment and you can manage and use a range of things depending on what you have. Here are some very easy steps “How to Make a Diamond Kite?”
First of all, we will tell you about the things you need to make a diamond kite.
Things You Need to Make a Diamond Kite
- Take Plastic bags or newspapers
- Take two burly, straight wooden sticks doweling 90cm and 102cm
- Take masking or scotch tape
- Cutter or Scissors
- Take thread for flying and for making the kite
- Take a little saw or small knife for cutting the wood sticks
- Take a small cloth and cut it into two strips about 2 inches wide and 12 inches long
- Take markers or crayons to decorate your kite
Okay, that’s all the materials you need; you don’t require a lot of material or things to make this kite. Now here are the steps as well as instructions on how to do it.
Steps/Instructions (How to Make a Diamond Kite?)
- First, just make a cross with the two sticks, with the shorter stick placed straight crosswise against the longer stick. Make definite that mutual sides of the cross piece are the same in width.
- Second, bind the two sticks together with the thread in such a way as to make certain that they are at right angles to each other. An excellent way to make sure that the joint is strong is to put a bit of glue to stick it in the rest.
- Third, cut a nick at every end of both sticks. Then make it bottomless and adequate for the type of thread you are using to fit in it. After that cut a piece of thread long adequate to make it bigger all around the kite frame. Next, make a loop in the top nick and fasten it by wrapping the thread in the order of the stick. Make bigger the string through the nick at one end of the cross-piece, and make another round at the base. Elongate the thread through the mark at one end of the loop at the base. Again make bigger the thread through the nick at the other end of the cross-piece. Come to an end by covering the thread a few times around the top of the stick and cutting off what you don’t require. This thread frame must be tight, but not so tight as to bend the sticks.
- Next, place the sail material flat and put the stick frame face down on top. Cut around it, parting about 2-3cm for a margin. Then crease these boundaries over the thread frame and tape or glue it down so that the material is stiff.
- Then, cut a piece of thread about 122 cm long. And then bind one end to the round or circle at the other end of the thread to the loop at the base. Fasten another small loop in the string just above the meeting point of the two cross pieces. This will be the kite’s bridle the thread to which the flying line is attached.
- In the end, time to make a tail by tying a tiny ribbon approximately every 10cm along the length of the thread. Finally, attach the tail to the loop at the base of the kite.
Diamond Kite Tail

Trying to fly a kite without a tail might result in the kite rotating and rolling around a lot as the kite is unbalanced.
Adding a tail to a kite helps make the kite fly more firmly by adding a few required mass and drag to the lower backside area of the kite.
Adding a tiny tail, like the 4-inch-long tail, possibly will help the kite fly a little more sturdily, but it will still rotate and roll around a lot.
Adding a longer tail, like the 40-inch-long tail, should facilitate the kite fly fine, allowing it to get comparatively high without rolling much.
A very long tail, such as the 200-inch-long tail, will help keep the kite from rotating much, but the tail possibly will be so weighty that it will not let the kite fly very high.
Some kite makers suggest adding up a tail to your kite that is approximately 3 to 8 times the length of the kite, but the finest way is that you should decide the best or correct length for your kite is to try it out.
Magical Tips
Here are some of the magical tips which will definitely help you a lot while kite flying really successfully.
- Choose an area that is clear of barriers like houses, trees and power lines, etc. Beaches and parks are typically good places, but keep in mind that kites can collide and be shattered by the waves. Fly kite only where the kite will not produce a risk or danger.
- Big kites are less troubled than little kites, have you seen? The small designs just require more concentration as they are in the air, largely because they lean to have smaller wind ranges. Not only this, except when you make a definite alter, it makes more dissimilarity on a small kite than on a large one. For instance, shifting a bridle knot by a small number of mm or 1/4 inch. A minute varies can make all the variations on a small kite.
- The thing about weight inequity is that it makes the most dissimilarity at the low end of a kite’s wind variety. As the wind picks up, smooth flaws start to show up, but of course, the weight stability never changes. Its consequence gets more unimportant, the harder the wind blows.
- To proper a weight inequity, it would be smarter to try and take away weight from a spar tip rather than add weight to the other tip.
- Drag is reasoned by the dissimilarity in air weight between the front and back of the kite and the resistance of the air moving over the outside of the kite. To fly a kite into the air the force of raise must be greater than the force of weight. To keep a kite flying stable the four forces must be instability.
- Weighty kites, however, will require more wind to raise their weight up into the sky. Experts agree that most standard kites will fly fine in light breezes of 4-10 miles per hour. As a common rule, there’s a possibly adequate wind to fly a kite if you can feel a breeze on your face.
- A bigger kite with a strong thread usually can be made to fly up in the sky to a higher height. Typically kites fly at a height of some 200-300 feet above ground level.
- Keep in mind that do not try to get the kite down yourself
- Never fly a kite during an imminent hurricane or in rain, as a wet line will conduct electricity
- Do not make use of wire as a flying line
- Always scrutinize local air safety rules. Keep away from flying in air traffic patterns near airports
Conclusion
So you can now make your own diamond kite by following the steps and tips in this article.
A colorful and high gracefully kite in the clouds is a lovely sight. Making your own kite must be an act of artistry and happiness.
Other than even the selection of a store-bought kite is a form of personal expression and a celebration of what’s stunning to you. Think of it as having happiness on a cord.
Hope you will be an enjoyable experience as a result of flying your own decorated diamond kite.