A lot of people especially in the U.S. enjoy a life outside the indoors. Be it fishing, camping, skydiving, or even the most popular of them all – cruising in an RV.
knowing how to replace or repair your RV Waste Valve will help you save a lot. In this article, you’ll learn what to do if your RV Waste Valve is stuck closed.
Unscrew the cap to the RV waste dump pipe; you will be splashed with smelly goo before the gate is even opened!
When you see liquid dripping from the RV waste dump pipe when the valve is not opened, this means that something is stopping the gate valve from seating properly.
What are the likely causes of this problem? (Diagnosis)
Here are tips to show you how to remove and replace the gate valve yourself.
Find the leaky RV waste tank valve:
- Most RVs have several wastewater tanks. You have to know where the leakage is coming from, well this can be more time-consuming than the actual repair.
- Ensure you have enough time to check each tank.
- You will have to fill up, empty, flush, and rinse each tank properly at least twice to ensure all dirt that is stuck in there is eliminated from the system.
- Secondly, you will have to disconnect the waste dump hose, then properly cap the waste pipe.
- Let the valve be open throughout the night or long enough so that the waste pipe will drip completely dry.
- Go inside the RV and add up several gallons of water in one tank after all the valves are completely closed.
- Wait for 30 minutes, then come down from your RV and slowly uncap the waste pipe.
- Did any water leak out?
- When a small amount of leakage is seen well, that’s normal but anything more than a cup then you’s got a leaky gate valve. If no leakage was found, repeat the following steps for each tank until there is a leak.
- Do you have limited time? It might be easier to skip the following steps above and get a new one and replace all of your RV waste valves.
Replace all the Leaky RV Waste Tank Valve
You can still save more by just buying the replacement valves that match your gate valve assembly yourself; it’s more cost-effective to change all the units.
Well, it will eventually fail due to wear and tear over time.
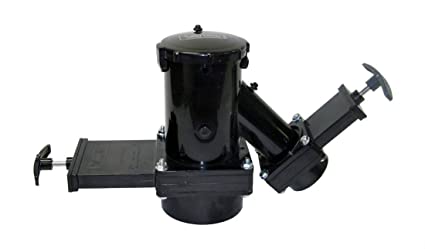
Before you replace valves, there are two different sizes:
- 1.5″ for gray water tanks
- 3″ for black water tanks
Make sure you purchase the appropriate assembly.
Some tools required:
- A crescent wrench or a socket set
- Screwdriver
- Gloves
- Protective eyewear
- Petroleum jelly
- Work light
How to Replace RV Waste Valve (Step by Step Guide)
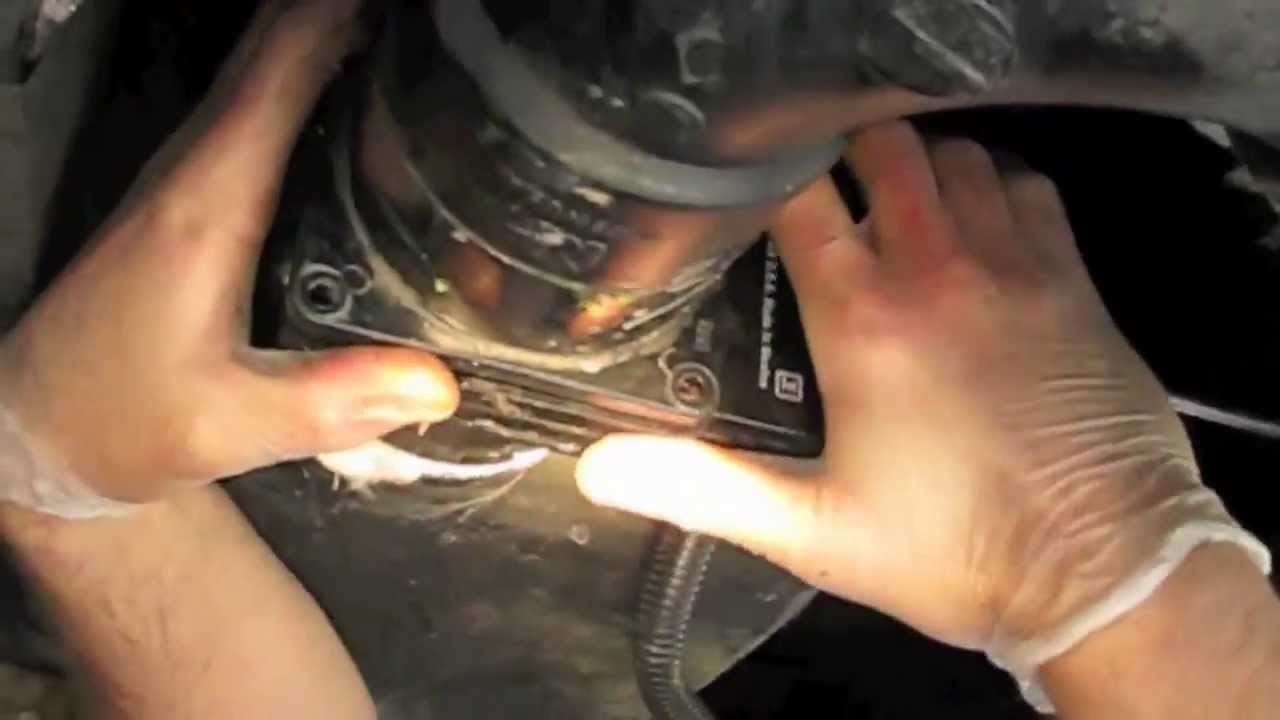
Step #1: Place a ground cover underneath your RV waste dump valve where you will place all tools. Remove all tank insulation material, if your RV tanks are insulated and undercarriage before getting started with the repair.
Step #2: Remove the waste dump gate valve handle by unscrewing it from the valve extension rod first, if it extends through the frame or chassis.
Step #3: Remove all bolts that hold the valve between the two waste pipes.
Step #4: Remove the flange seals if it doesn’t come out with the valve.
Step #5: Clean any debris properly through the two pipes to ensure new seals will seat firmly in their place. Spray it with silicone lubricant for easy assembly.
You have to open the gate valve assembly package after completing the previous step, gently remove the new flange seals and apply enough petroleum jelly which serves as a lubricant to hold the seals in place.
Step #6:. Insert the lubricated seals gently onto the waste pipes.
Step #7: If applicable (place the valve slider extension rod through the hole in the frame).
Step #8: Put the new gate valve body in the middle of the two waste pipes, and make sure the seals stay snugly in the valve grooves. Check if the seals do not fold or dislodge when aligning the new gate valve body.
Step #9: Return the bolts to the assembly and gently put them in place.
Step #10: Tighten each bolt until it is firm with the unit.
Step #11: Fill your waste tank with some gallons of water and check for any leakage before testing the new gate valve.
Conclusion
If your RV Waste Valve gets open or unstuck, then you’ve successfully repaired it. But if not, then you know it’s time to change or call an RV technician to repair it.
The good news is it doesn’t cost so much to get it fixed or replaced.
If your RV waste valve does have water in it, try dropping a whole bottle of original liquid Dawn Detergent in the tank. After a while, you would be amazed at how much crud Dawn breaks up.
It also acts as a lubricant for the valve.
This way you are going down the road the ice cubes will rattle around in the tank also stirring around the liquid Dawn, and this may be enough to free up whatever debris.
Try to keep the sewer valve from opening. It may sound stupid, but it works, and once you get the tank dumped, it will be nice and clean.
Once you’re done with your little road trip, you will need to hook back up to the sewer and try to open the RV waste valve again.
You may have to pull real hard to get it open; you might want to tap the handle of the waste valve with a hammer and the vibration from that tapping may also help free it up.
If after all the agitating, flushing, hammering, and pulling the valve still does not free up you may have to take your RV in to have it repaired by a qualified RV Technician or you can check in your area to see if there is a mobile RV service that can come to help you out.